How to Get Your ChatGPT API Key
Shaper includes free access to basic AI models like ChatGPT-5 Nano and Deep Seek R1 through Pollinations. However, premium models let you do more complex tasks, faster and better, such as making complex website changes and building custom apps & extensions.
To use premium AI models in Shaper, you'll need to add an API key from your provider. This guide walks you through creating an OpenAI (ChatGPT) API key and adding it to Shaper.
Note that OpenAI API access is primarily paid and does not offer a free tier. To access premium models on a free tier, try using Google's Gemini models via API. This guide will walk you through creating a Gemini API key and integrating it into Shaper.
Getting Started
-
Create your OpenAI account Visit the OpenAI platform and sign up for an account.
-
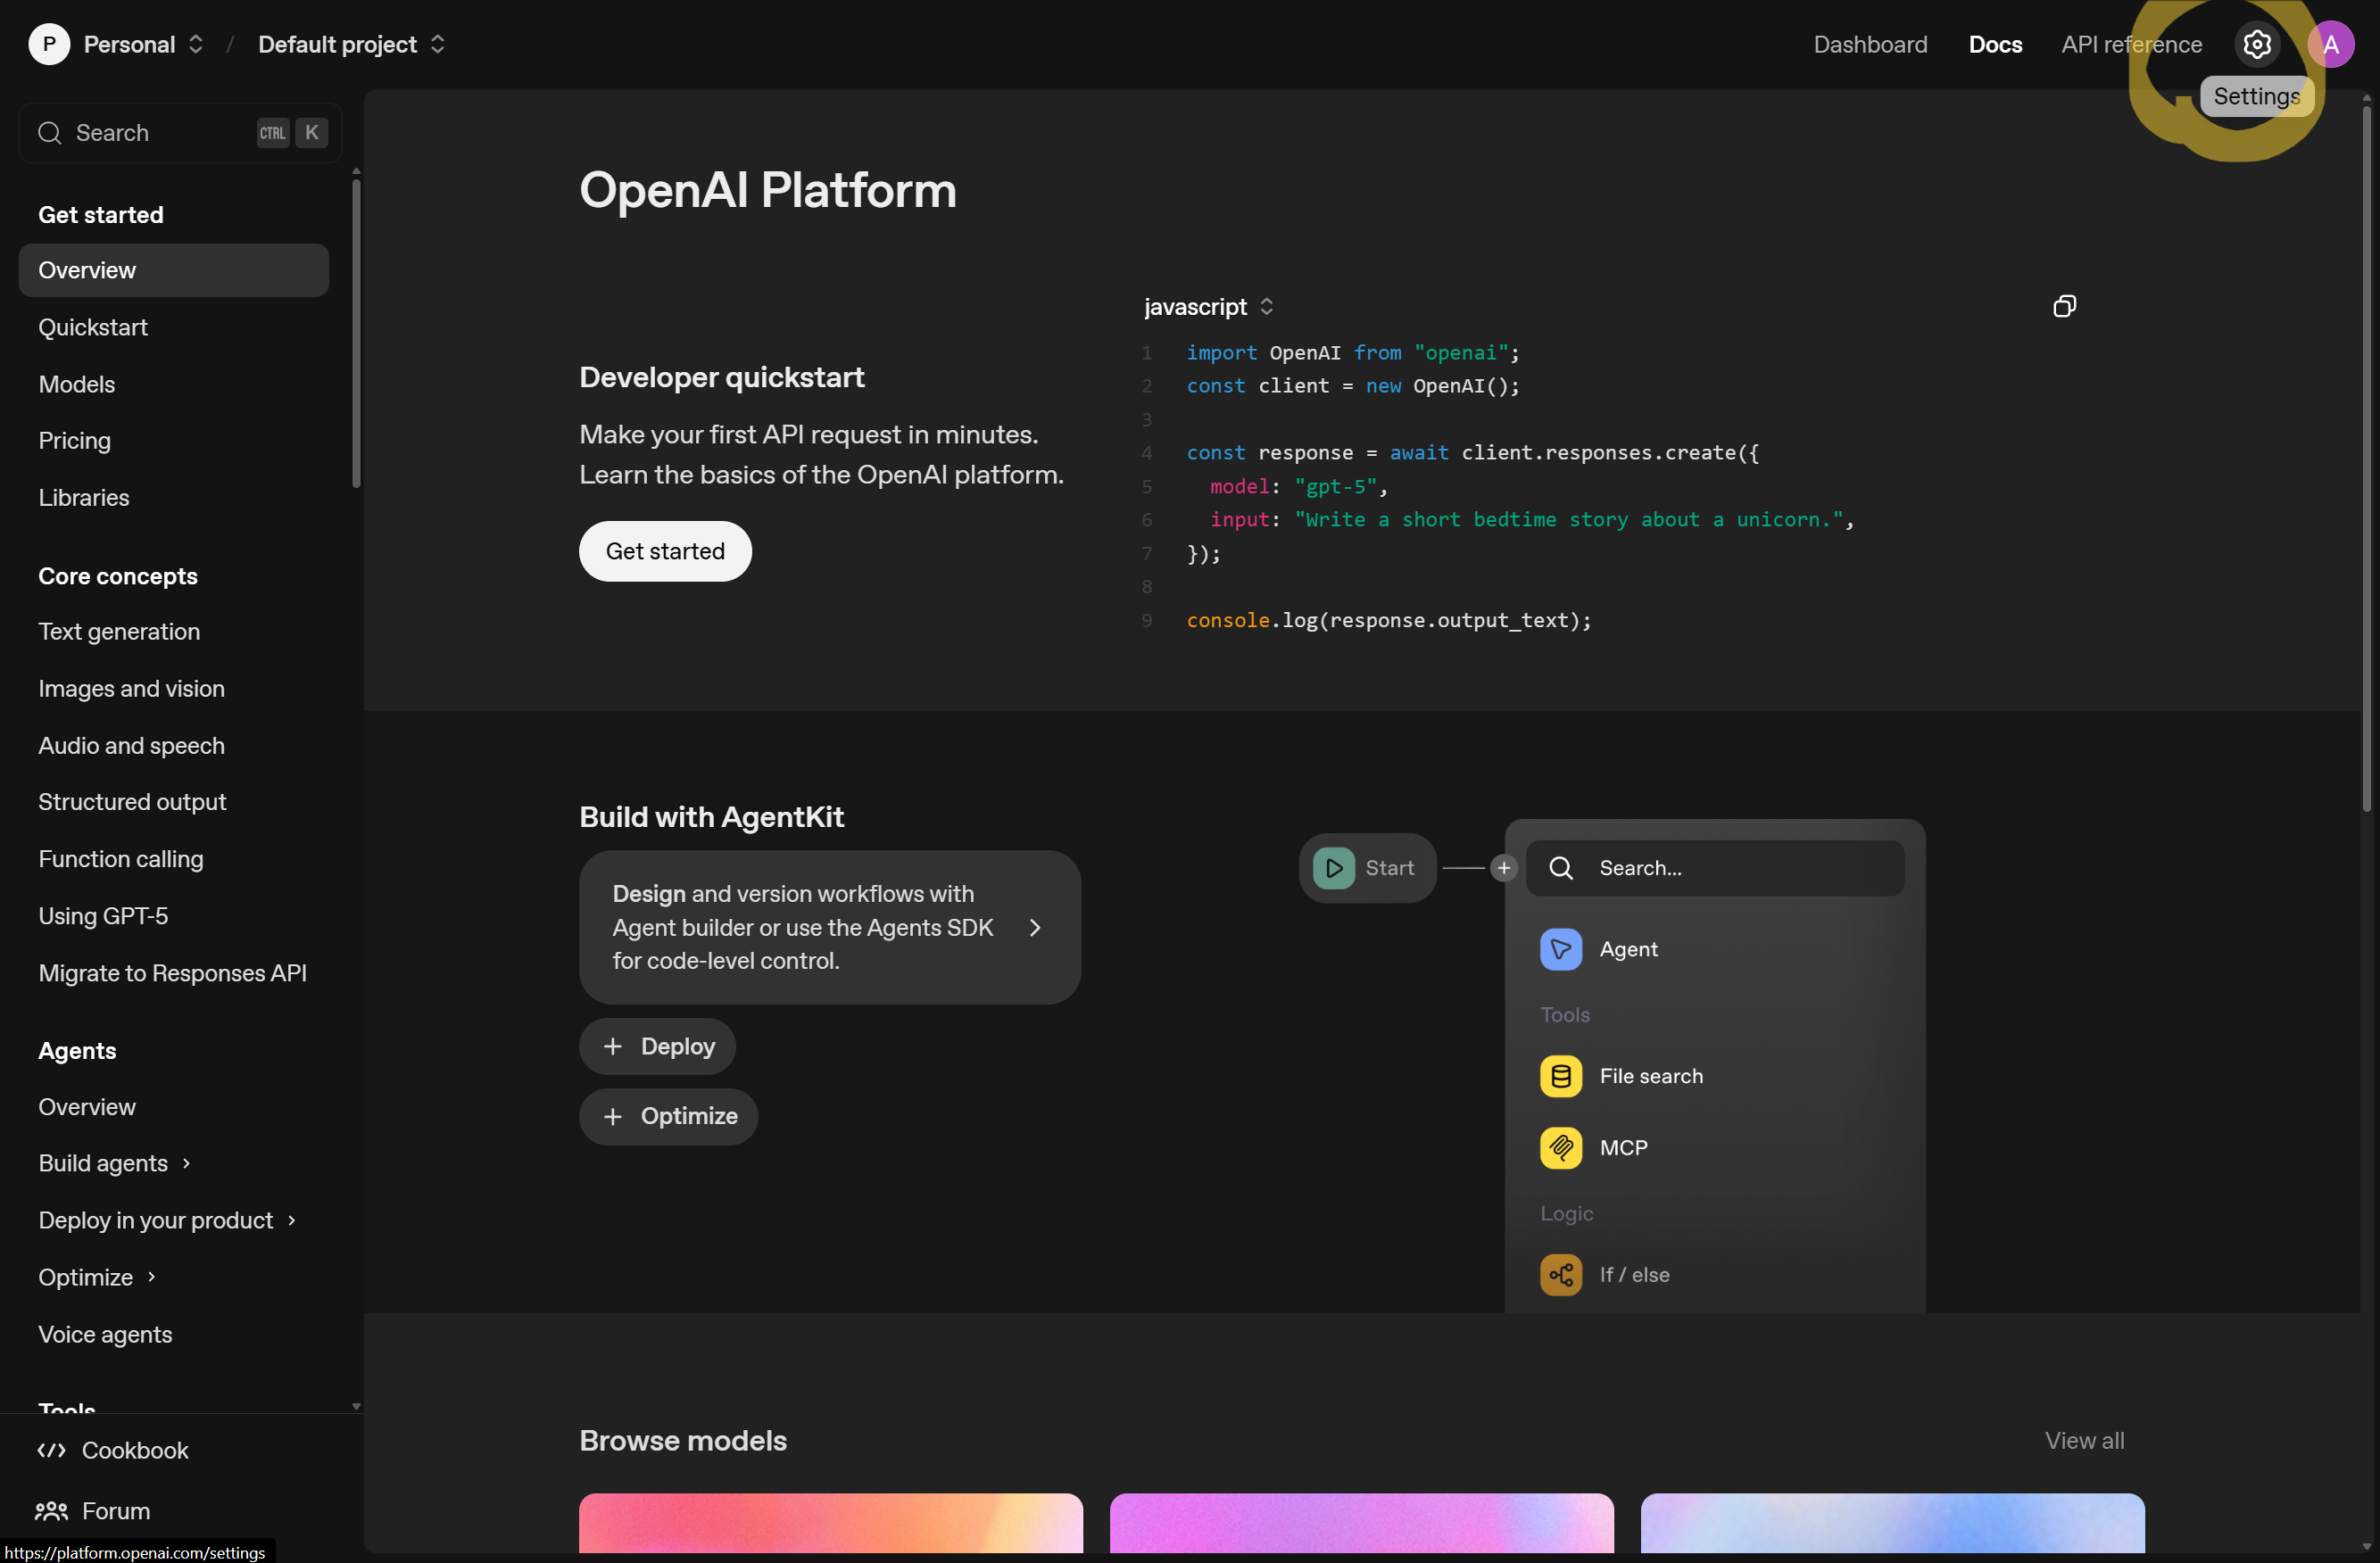
Access your account settings Once logged in, click on the gear (⚙️) icon in the top right section to open Settings. This is where you'll manage your API keys and billing information.
Creating Your API Key
-
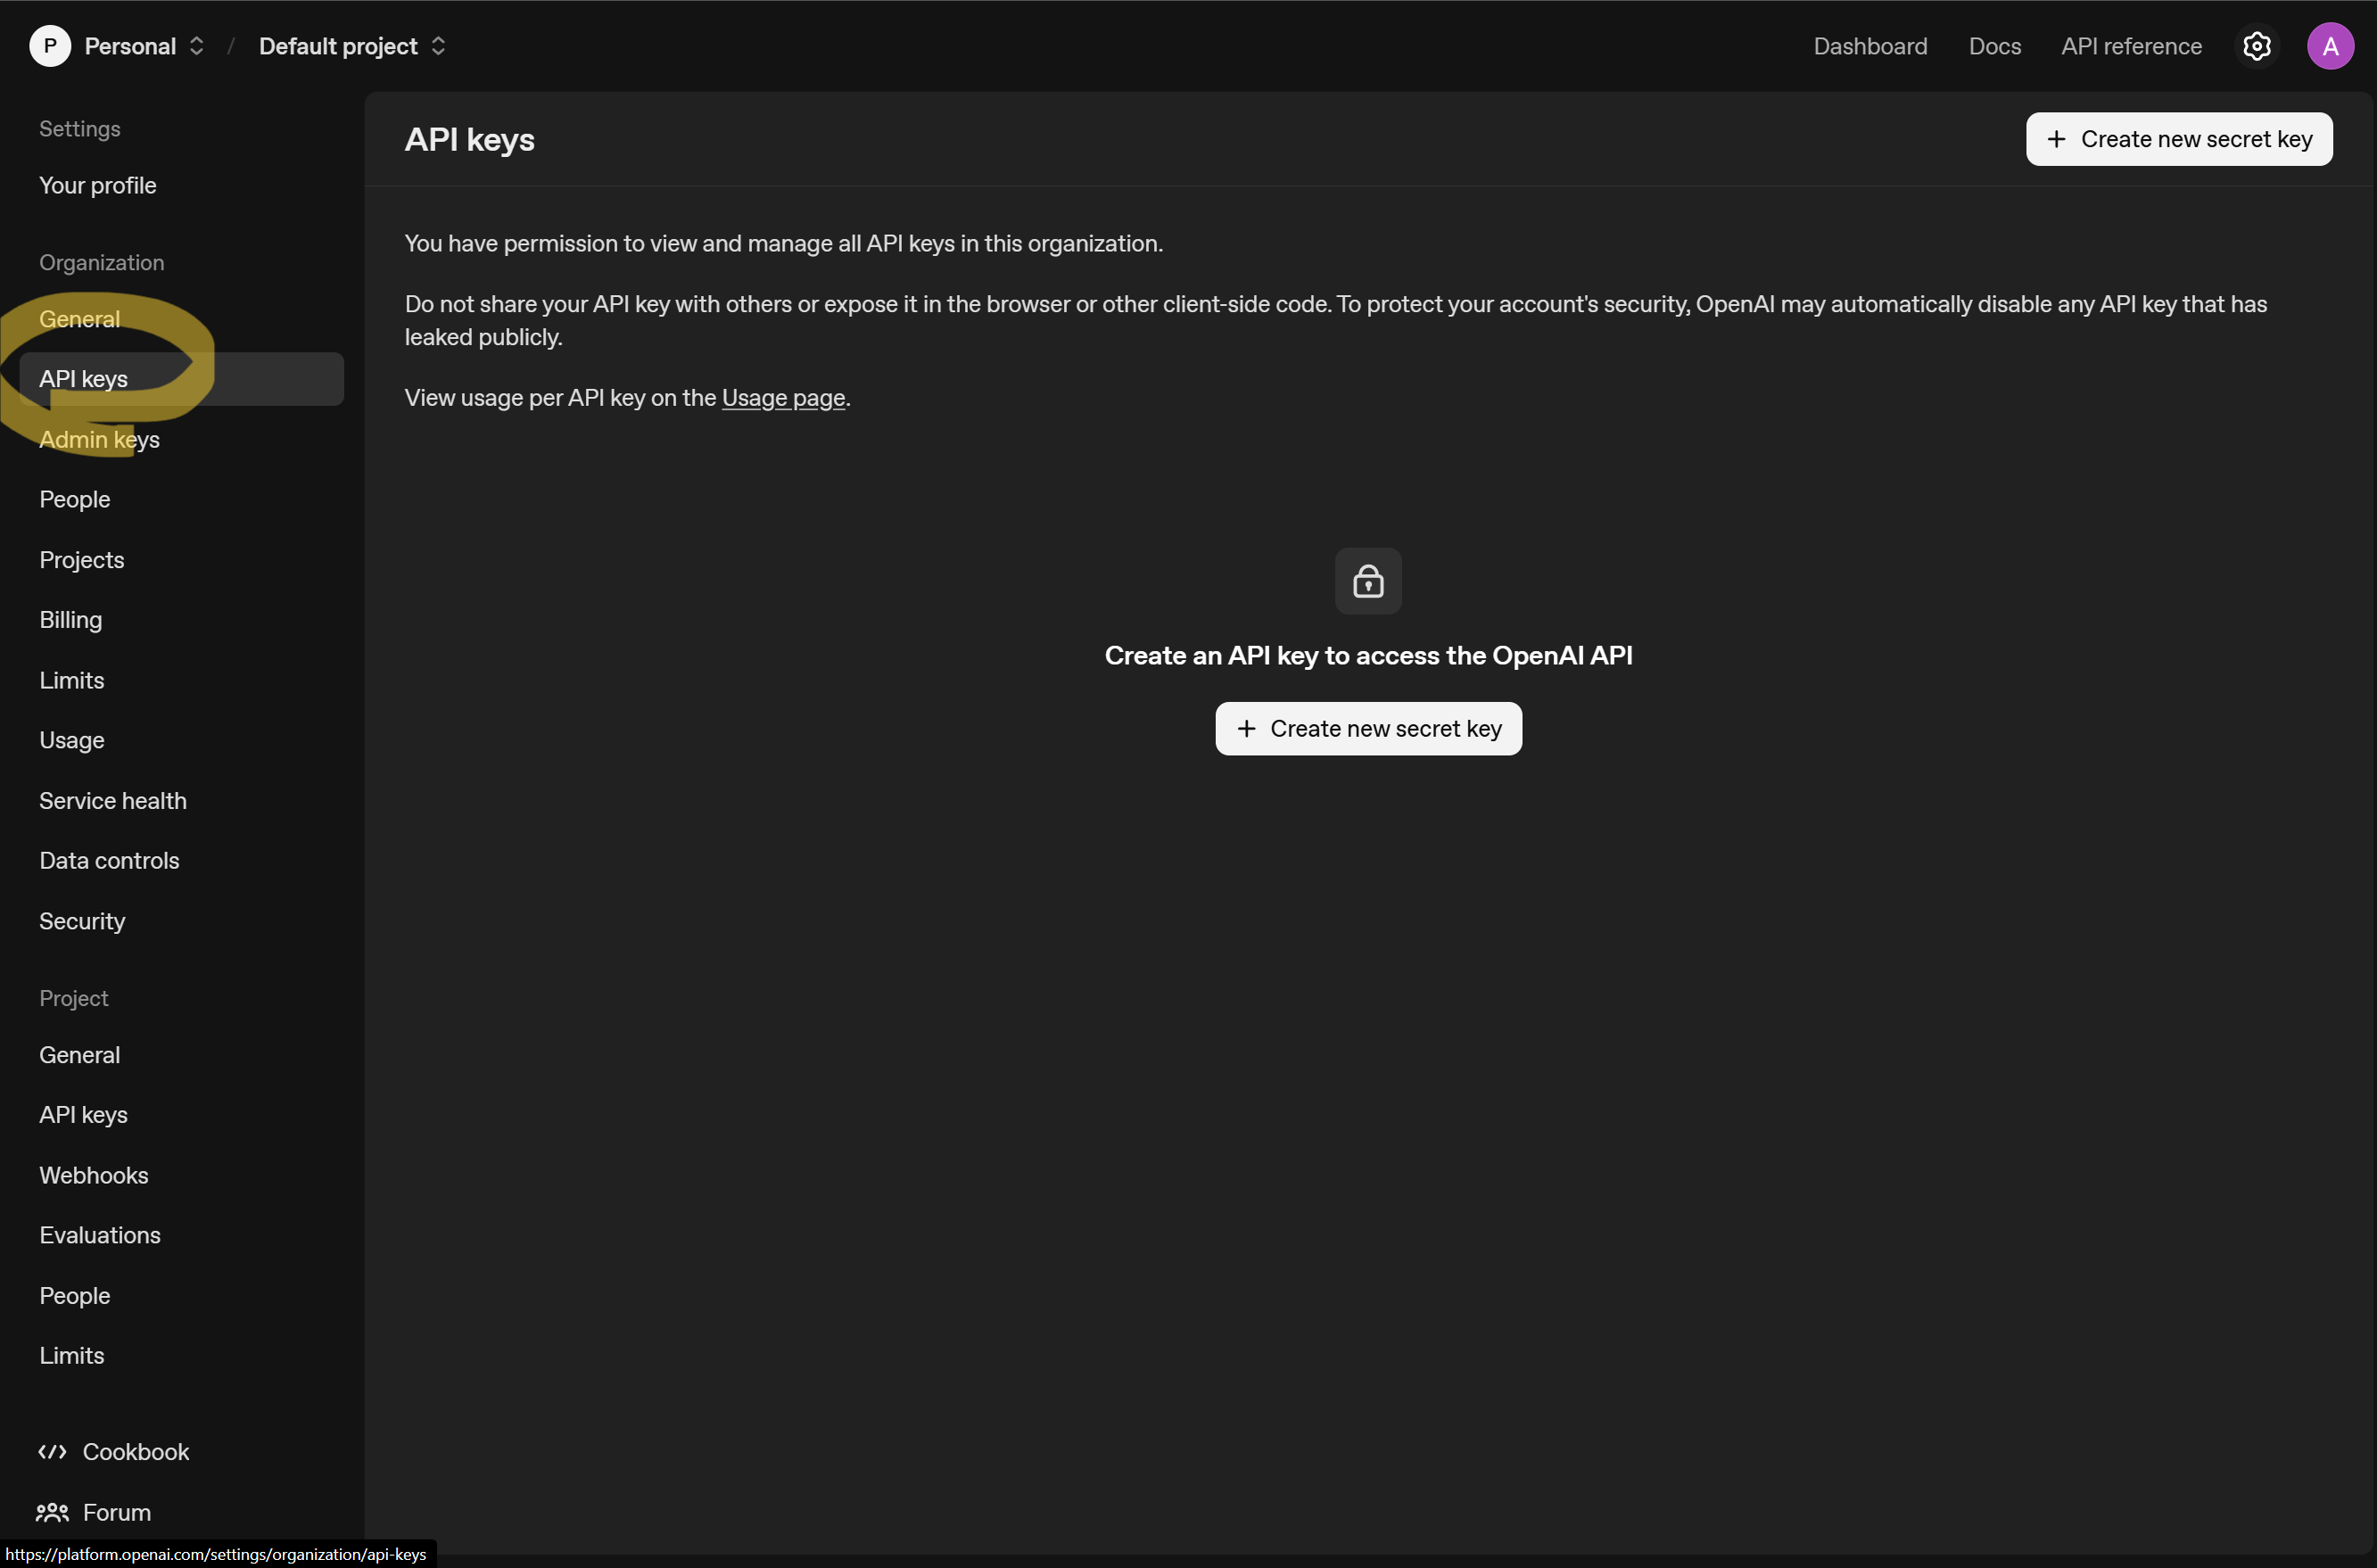
Navigate to API Keys section In the Settings menu, select "API Keys" from the left-hand menu or visit this direct link. You'll see all your existing API keys here (if any).
-
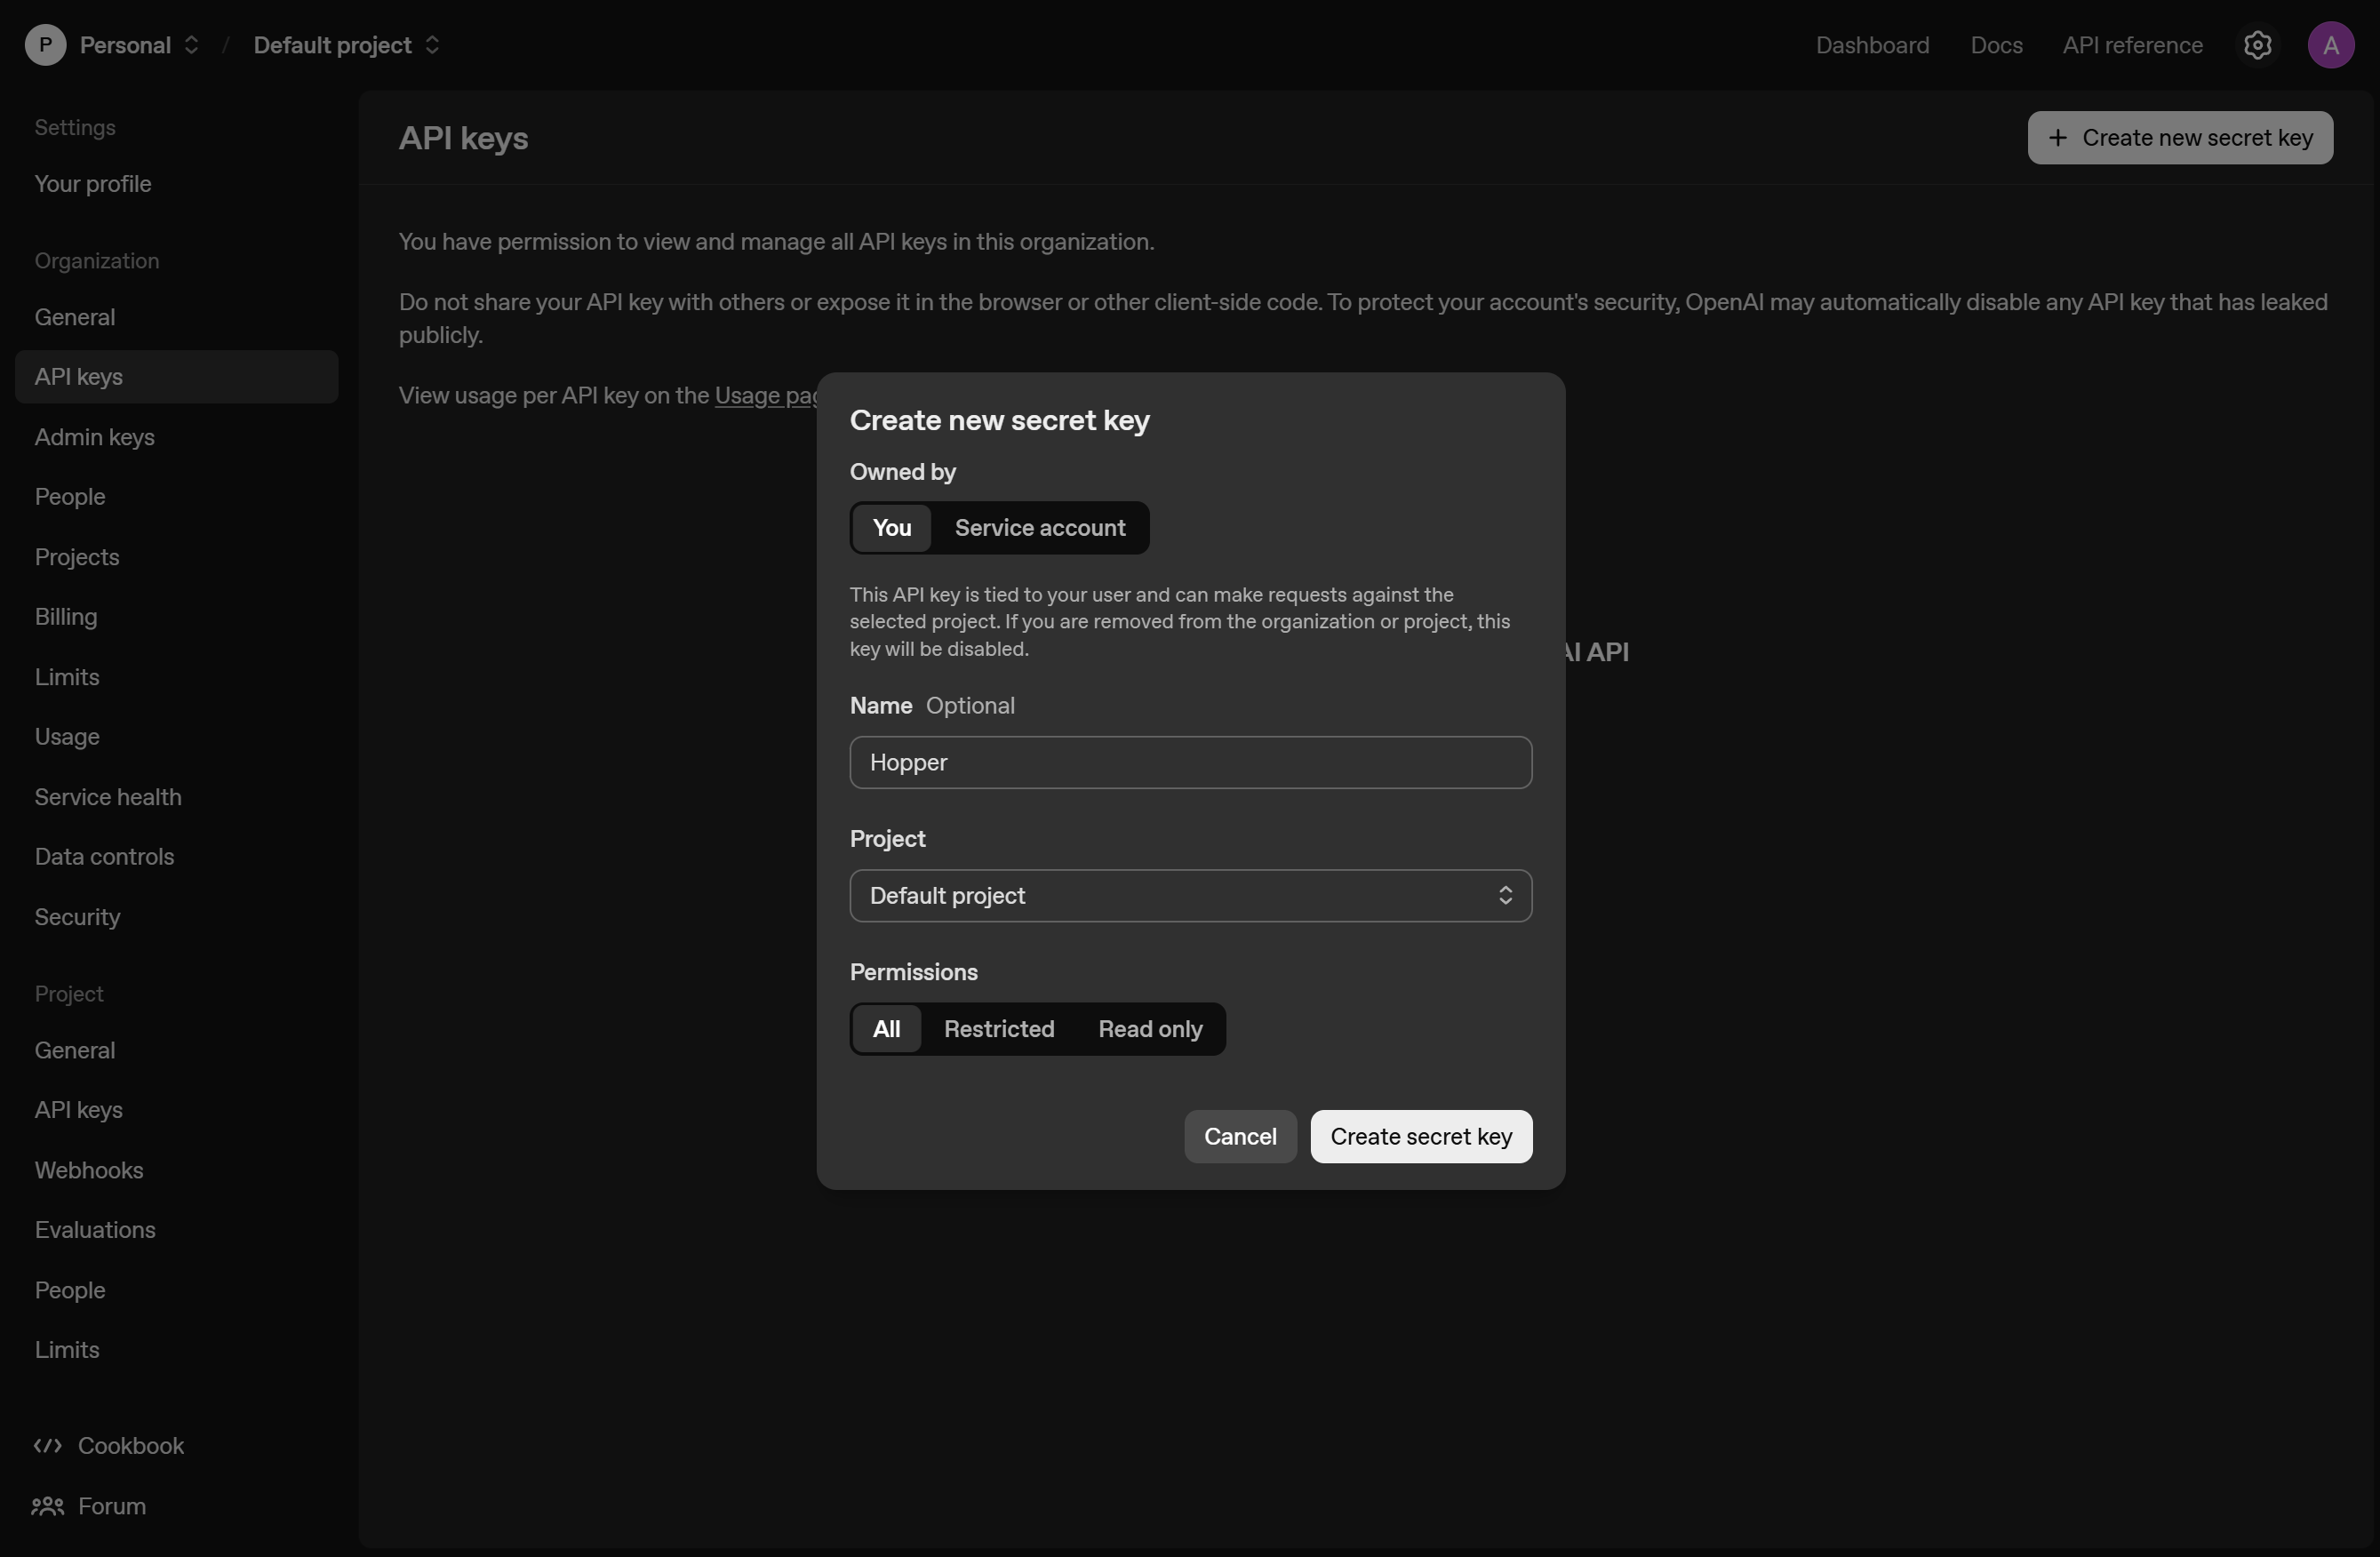
Generate your secret key Click the "+ Create new secret key" button. Give it a memorable name like "Shaper" to easily identify its purpose later. Click "Create secret key" to generate your new API key.
Tip: Use a descriptive name that helps you remember where this key is being used.
-
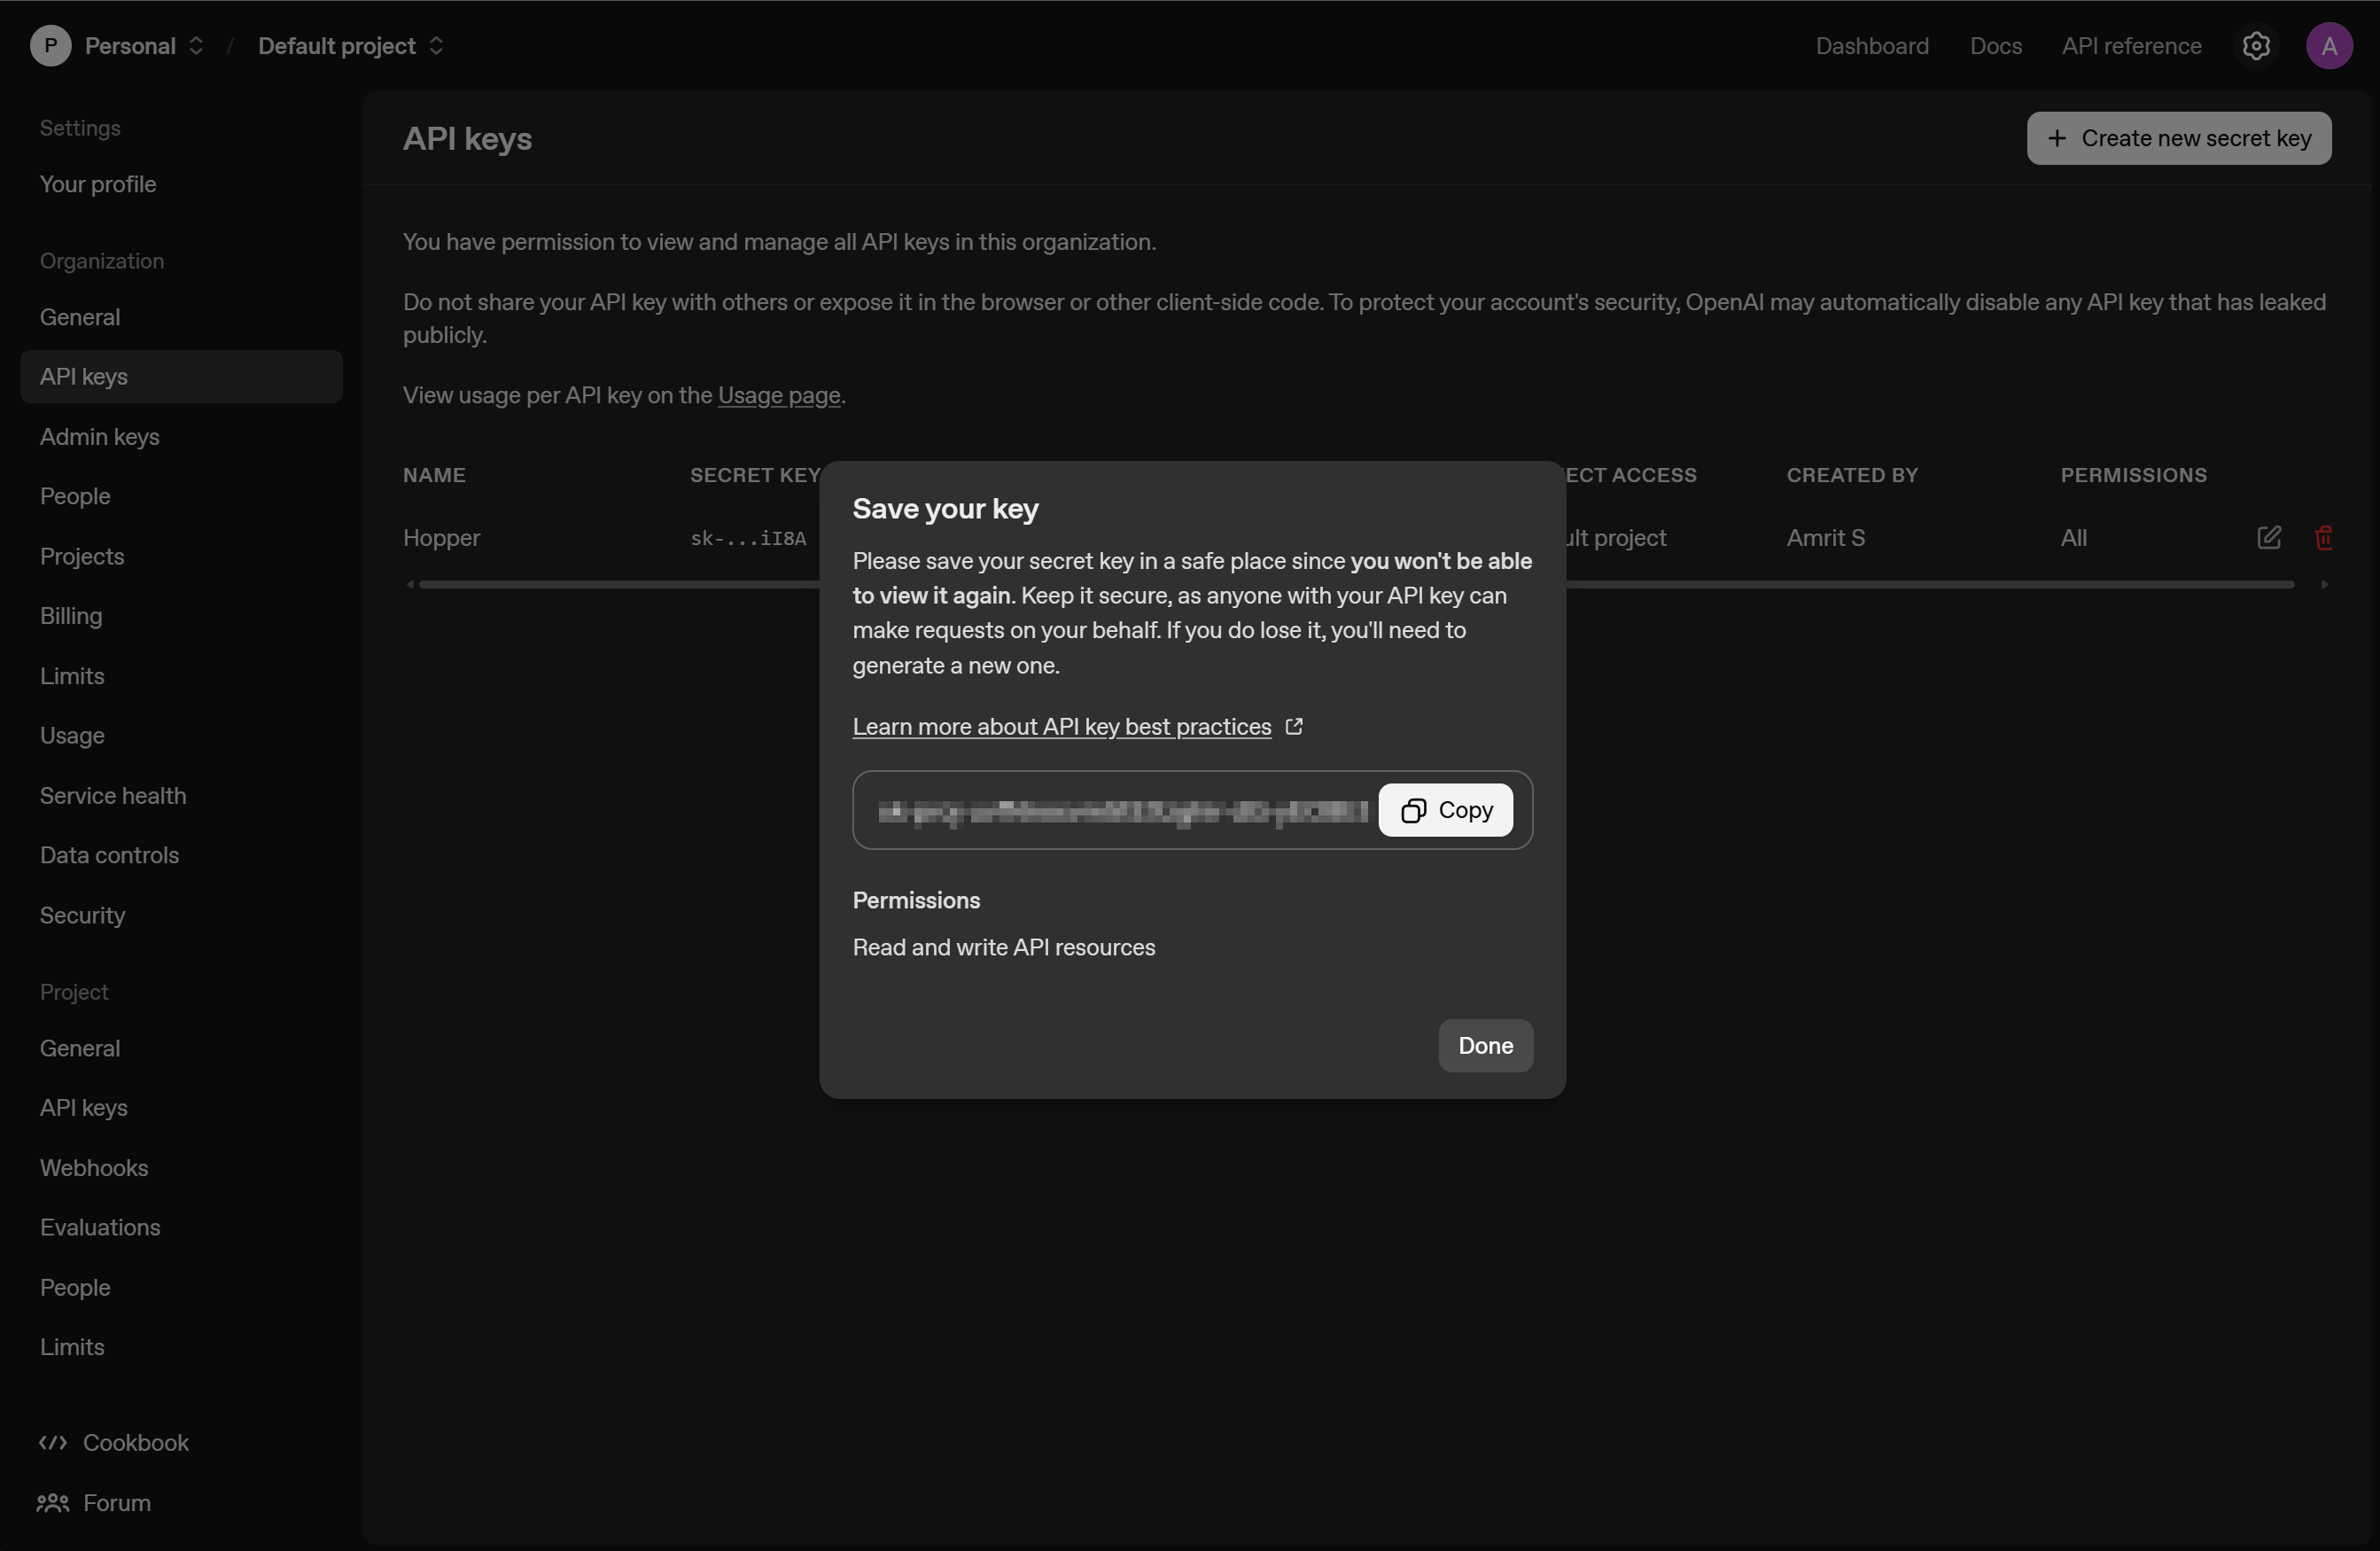
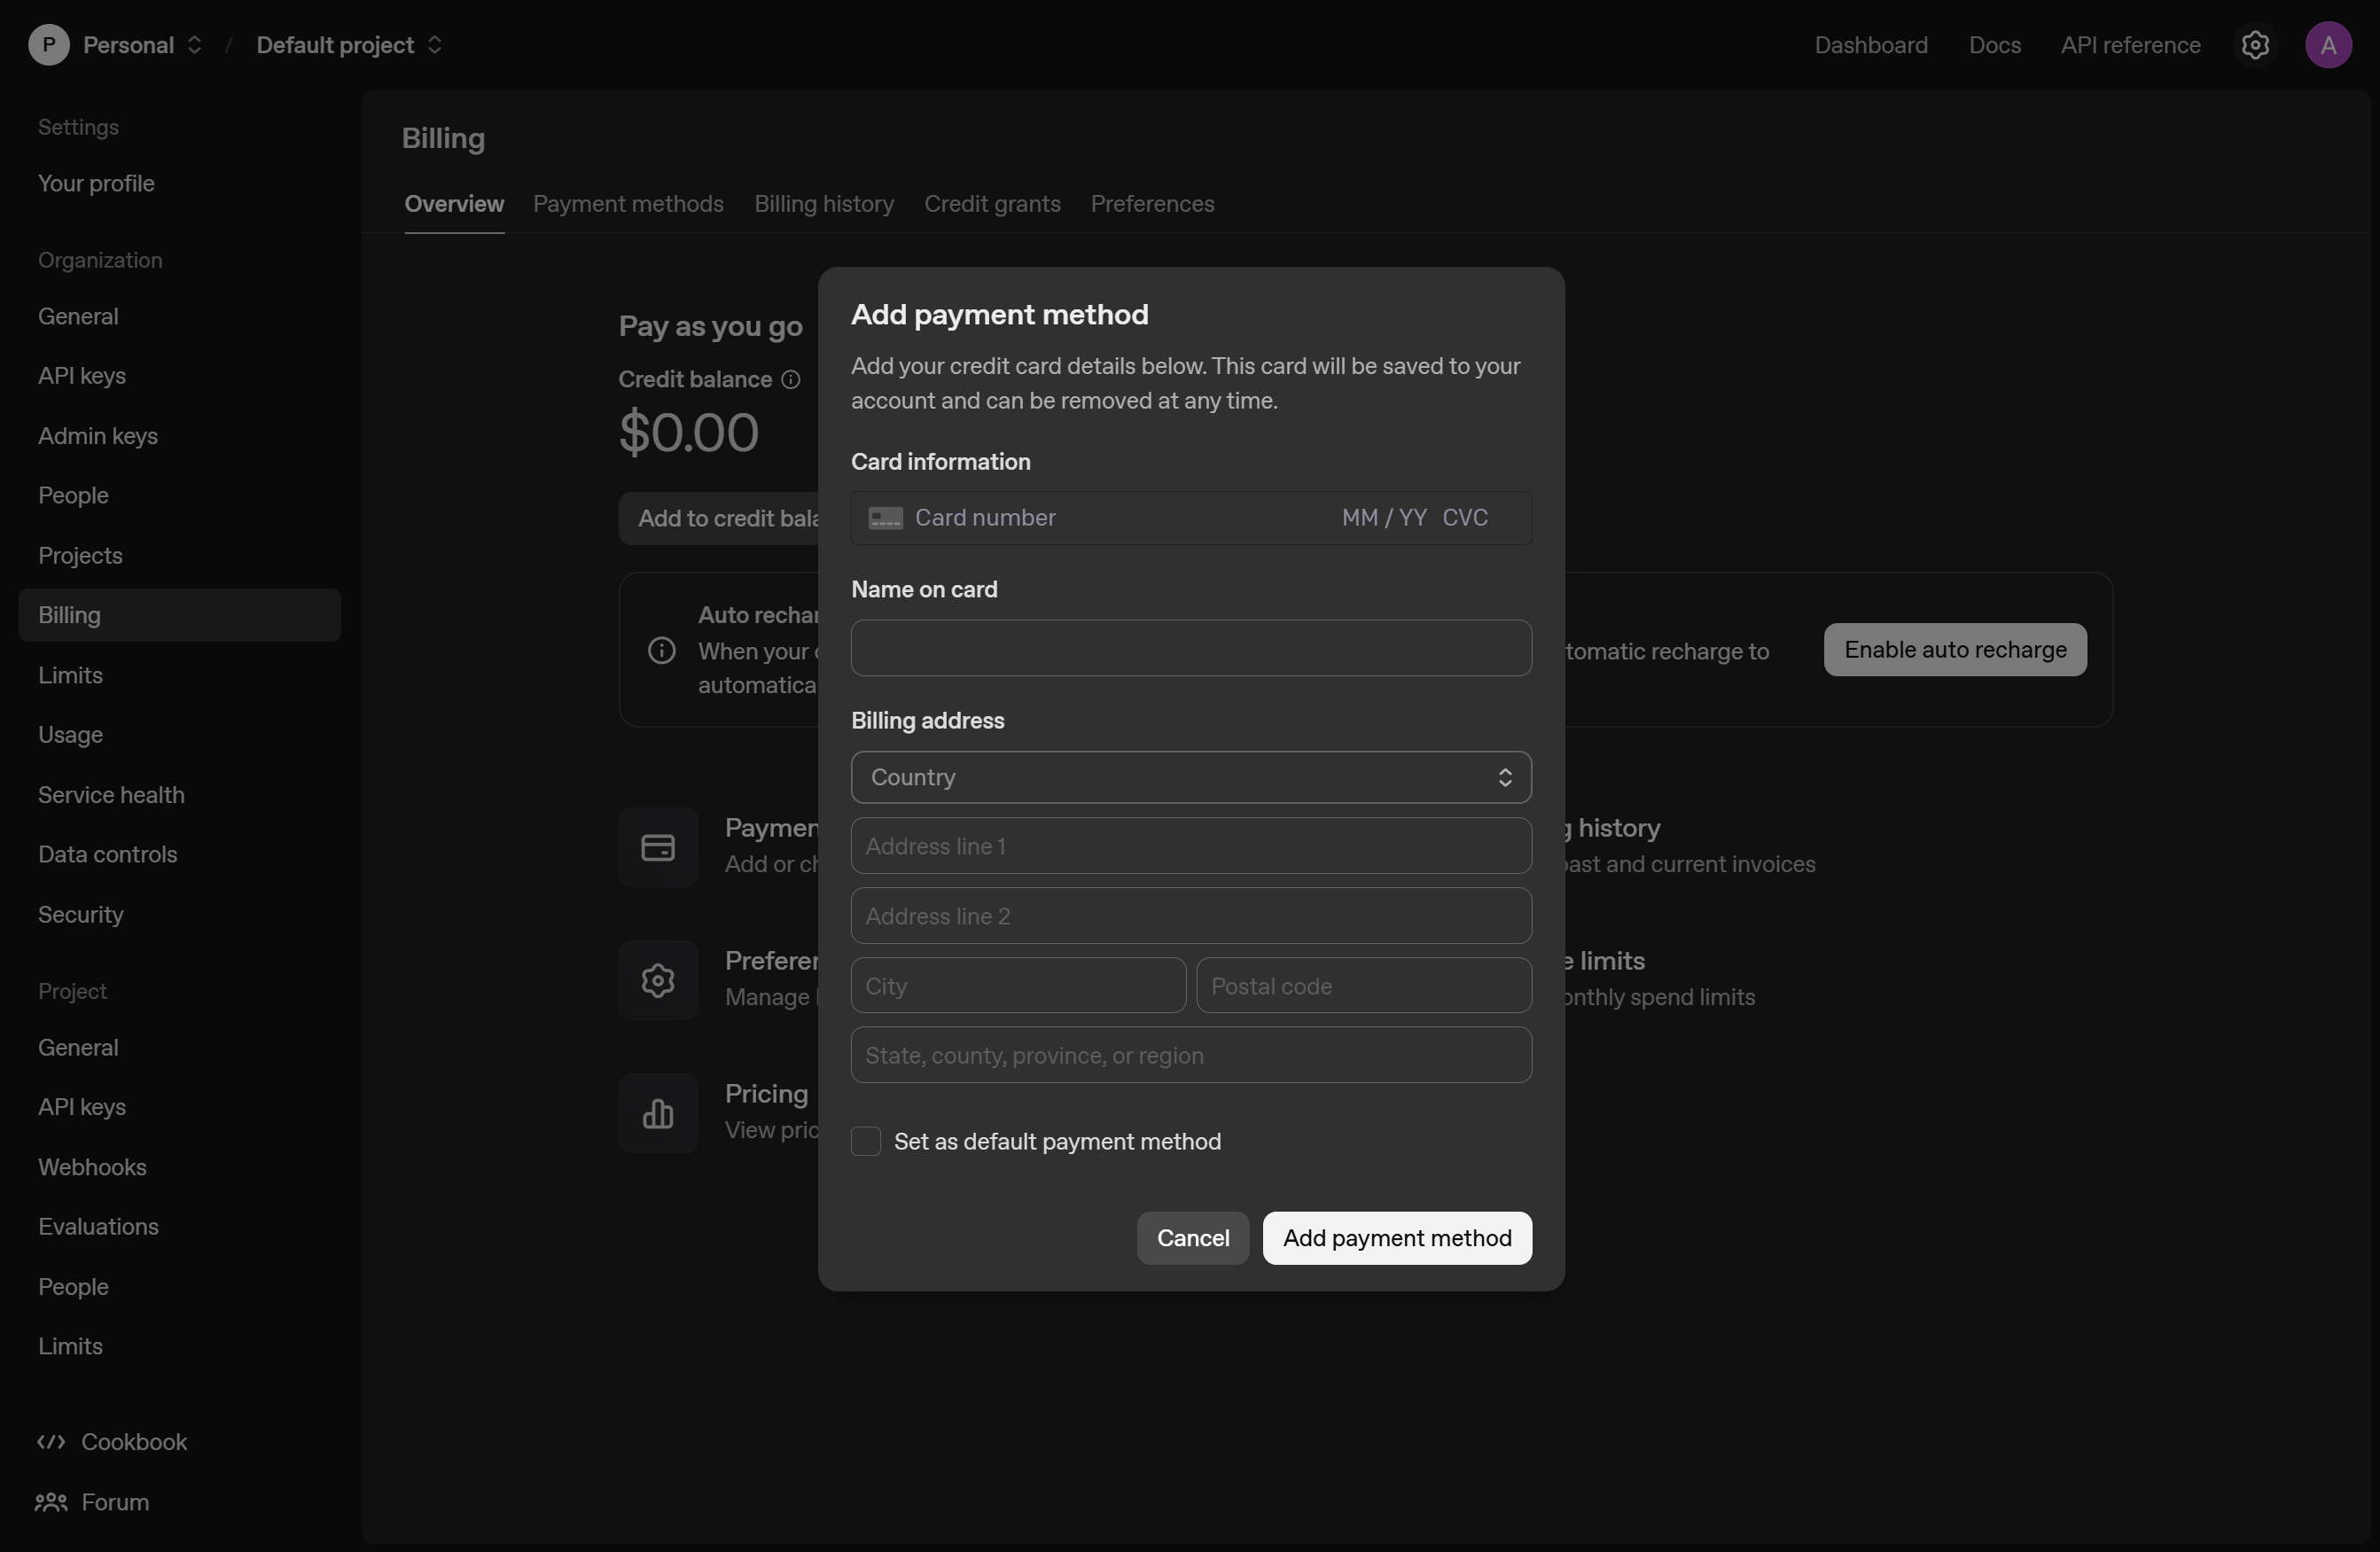
Save your API key securely Your unique API key will be displayed on the next screen. Copy this key immediately and store it in a secure place like a password manager.
Important: For security reasons, you won't be able to view the full key again through the OpenAI website after closing this dialog.
Setting Up Billing
-
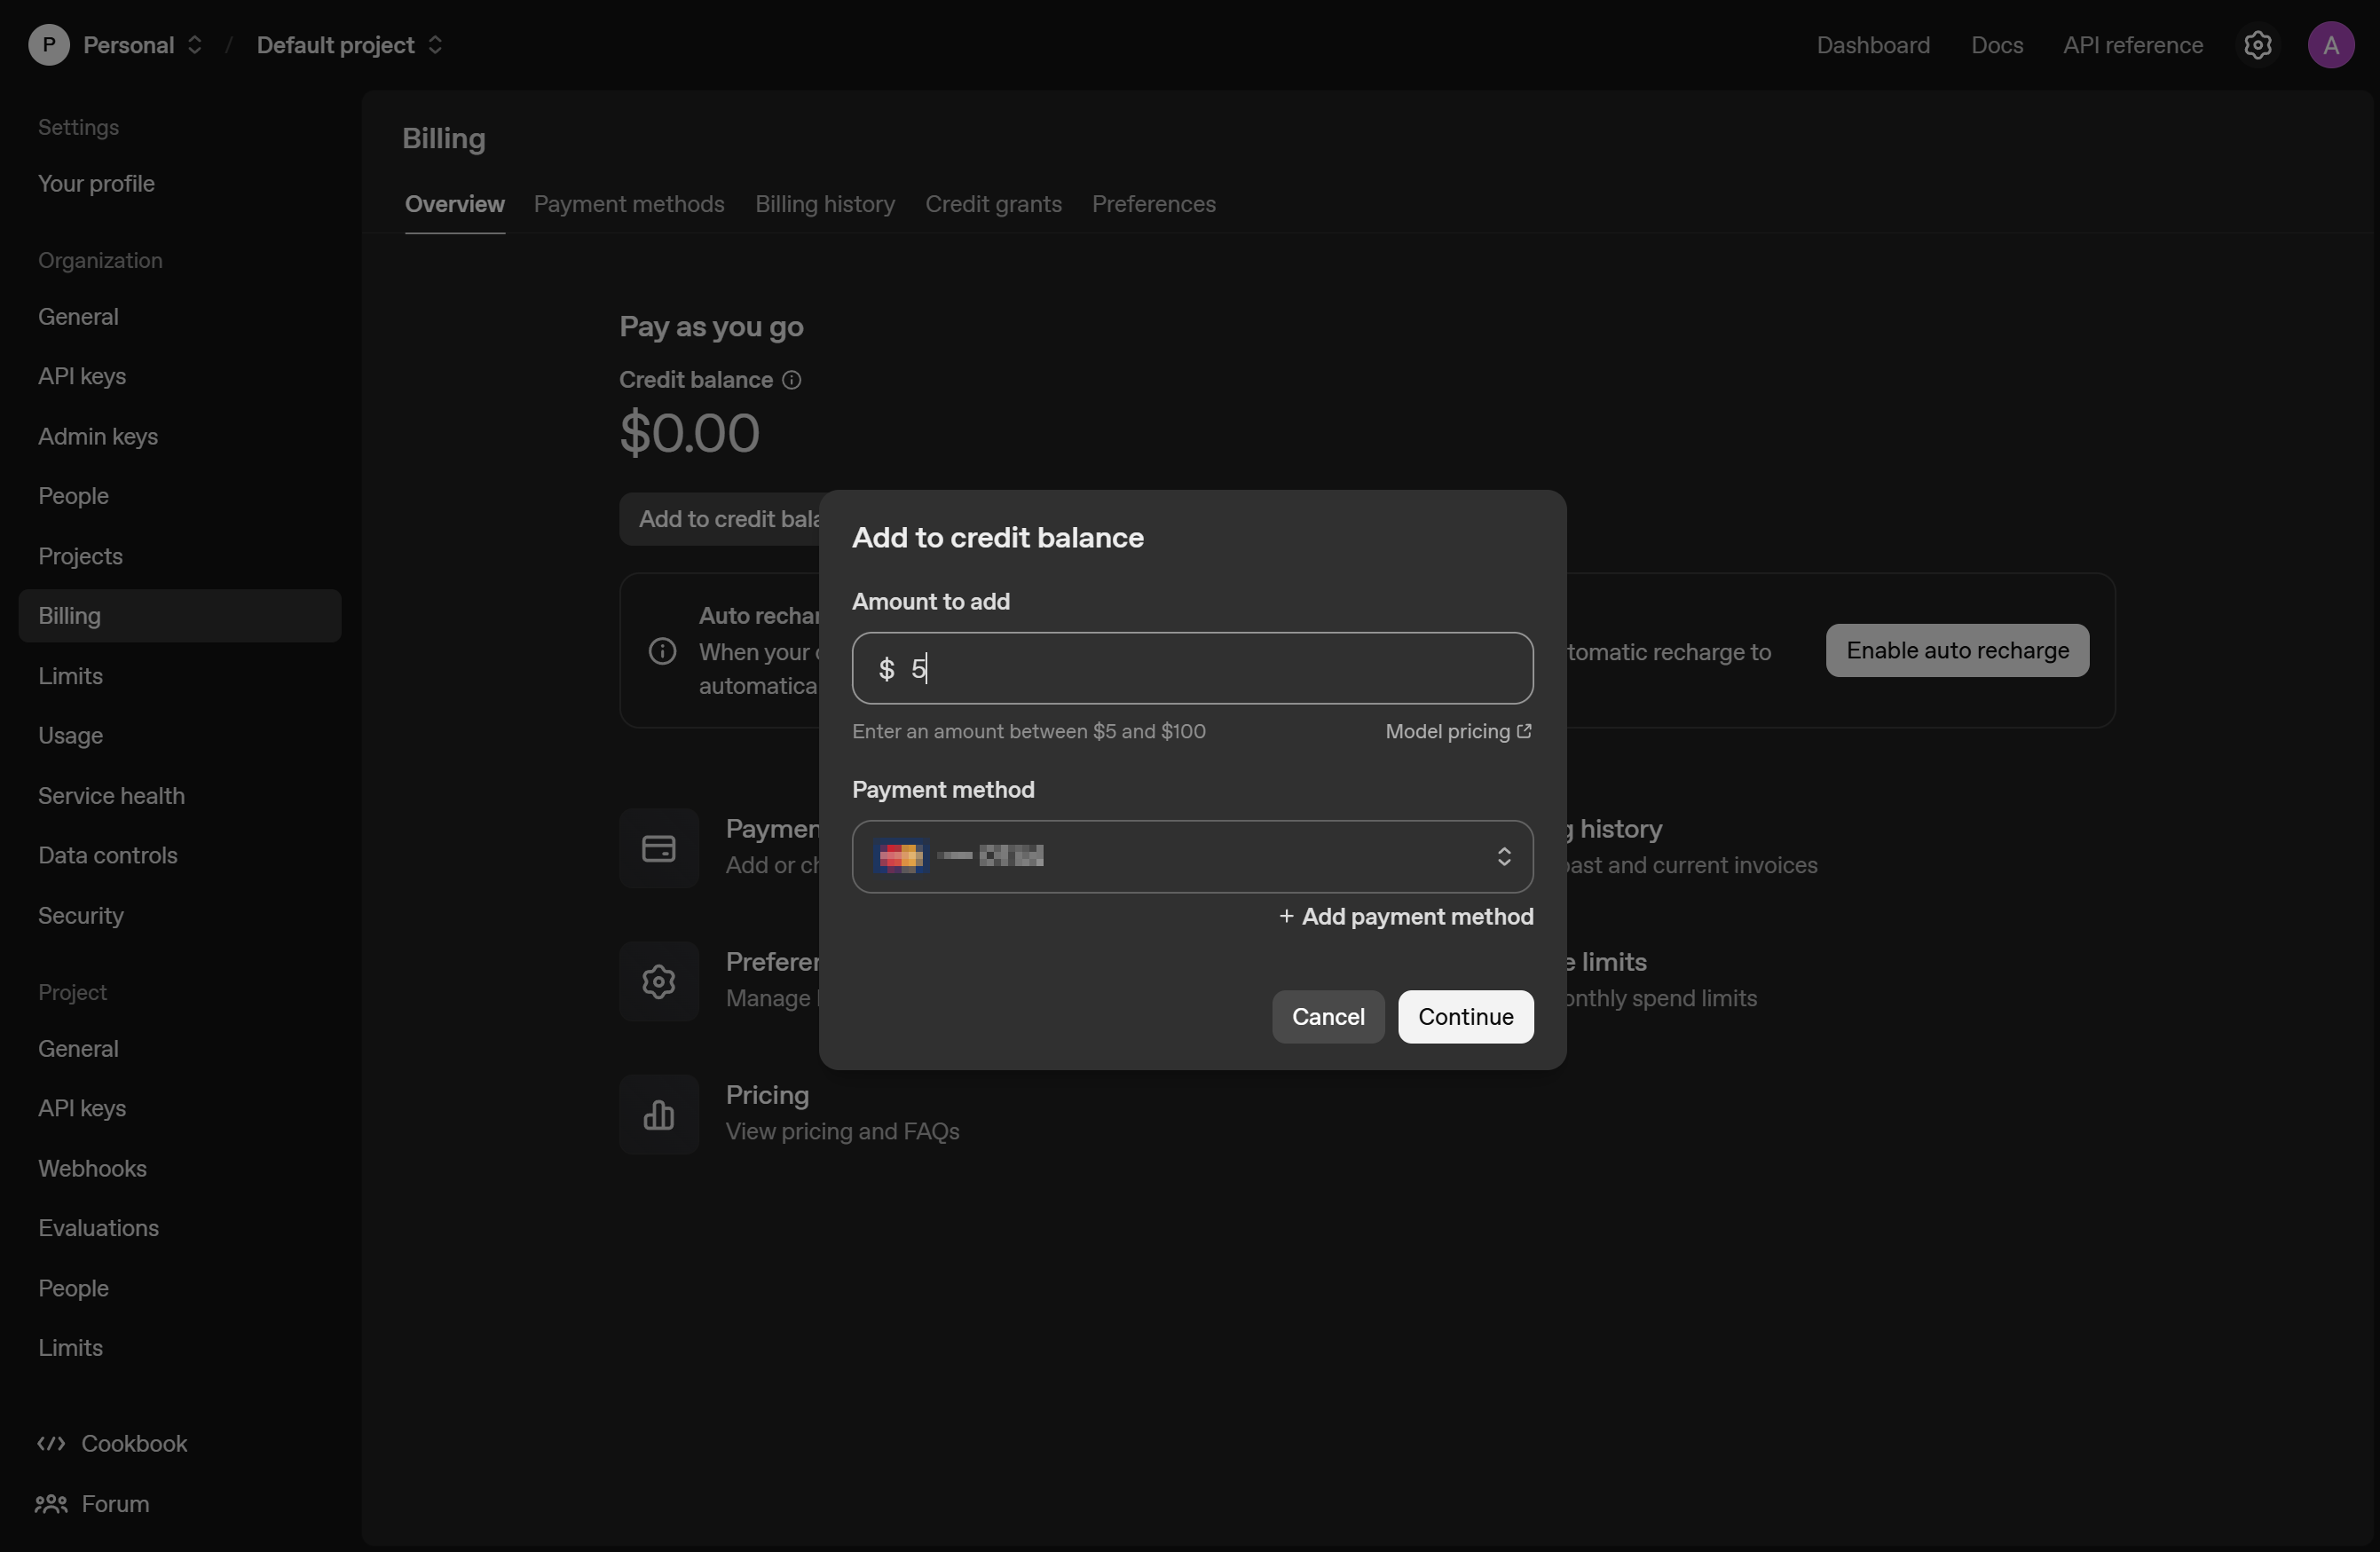
Add payment method Under Settings, select "Billing" from the left-hand menu. Click "Add to credit balance" to set up your payment method.

-
Configure your credits Add an initial credit amount to your account. Optionally set up automatic recharges to ensure uninterrupted service. Provide your payment information as prompted and confirm your purchase.
Tip: Start with a small credit amount like $5-$10 to test the service before committing to larger amounts.
Connecting to Shaper
-
Open the Shaper chrome extension.
-
Navigate to Settings Tap the gear (⚙️) icon in the top navigation bar to access Settings. Find the "AI Provider" section.
-
Add your API key Under "AI Provider:" select 'OpenAI'. Paste the secret key you saved in step 5 into the "OpenAI API Key" field. Select "Test API Key" to ensure your key is valid and working.
-
Select your preferred model You can explore OpenAIs models and compare their capabilities on their official website here.
What Happens Next
Shaper is now connected to OpenAI! You can now:
- Make complex website modifications that need longer context windows.
- Build complex custom apps and extensions.
- Pass long articles and web content to AI in chat.
Troubleshooting Common Issues
Key not working? Double-check that you copied the entire key without any extra spaces or characters.
Errors while using Shaper? Ensure you have sufficient credits and your payment method is valid in your OpenAI account.
Connection failed? Try removing and re-adding the API key in settings.
If you continue to experience issues, reach out to us here and we'll be happy to help.